You can make a lot of homemade amulets from salt dough. Grain and salt carry an energy charge of warm family energy. The house will become much more comfortable with such a talisman, which you can easily make with your own hands.
DIY dough amulets
You can teach children this simple skill. So, during the game, you will create good defenders of your home - traditional figures. They can be painted, dried - they will last for many years, maintaining peace and tranquility in the house.
A great opportunity for women to practice home magic. Your kids will love this simple method. Bring happiness to your home using an old recipe. There is an excellent homemade amulet made from dough - it protects against all 33 misfortunes. Salt dough is easy to mold, and the result will definitely pleasantly surprise you. These little women's secrets have been passed down from generation to generation as a recipe for happiness.
Amulet made from salt dough. Horseshoe with fruits. Master class with step-by-step photos
In this master class you will learn how to make a talisman from salt dough - a horseshoe with fruit.
Materials and tools for making the amulet:
- salty dough
- plank and rolling pin
- paper or cardboard for patterns
- leaf shaped cutters
- breadboard knife
- universal leaf mold
- toothpick
- watercolors, acrylic paints or gouache
- varnish
- Super glue
Horseshoe amulet made of salt dough - master class
Let's start making this decoration with our own hands. Draw a horseshoe of the size and shape you need on a piece of paper or cardboard, and cut it out.
Roll out the salt dough with a rolling pin to a thickness of 1 cm.
We place our pattern on the rolled out dough and cut it along the contour using a breadboard knife. If you don't have one, you can use a regular kitchen knife with a thin, sharp tip.
Roll out the salt dough again, only now its thickness should be 3-4mm. And with the help of boats (which you can make yourself from tin).
cut out leaves of different sizes.
Or, if you do not have the opportunity to make cutters, you can use pre-prepared cardboard patterns.
Next, using a universal mold for leaves, we create a relief on our blanks.
If you don’t have such a mold, then the veins on the leaves can be made using a breadboard knife.
We put the finished leaves on our horseshoe.
Now let's work on the fruits with which we will decorate our horseshoe. You need to roll four balls of the same shape (they will later be apples) and two balls slightly larger in size (these will be pears).
Using a toothpick, press grooves on the balls that will be apples from the center to the sides (photo 11). Roll a small ball and stick it in the middle.
Beads and bracelets
Beads and bracelets are made using the same technique. First of all, you need to make beads. You can make them in a standard round shape by rolling them into a ball and stringing them on a toothpick. Or get creative and make square, triangular, flat and three-dimensional pieces. Each bead is pierced with a skewer, stuck into a soft base and dried in this form.
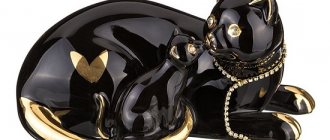
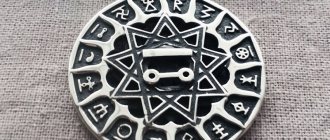
To make your jewelry more original, you can sculpt animal figures, symbols or zodiac signs. In addition, the same pendants on the beads and bracelet will combine them into one set. Then each part is carefully painted inside and out, dried and varnished. If this is evening jewelry, you can use glitter and mother of pearl.
The final stage is threading. The beads are strung on a bunch, observing a certain order, and the clasp is attached. The decorations are ready.
Horseshoe made of salt dough
For any event and for any holiday, a horseshoe is suitable as a gift for parents and friends, grandparents. It is believed that it brings happiness and good luck. Therefore, it is best to make it from salt dough, frame it and hang it in the house or on the door.
This master class will show you how to properly knead salt dough, how to fashion a horseshoe and decorate it beautifully.
Dough recipe
For the test you will need:
- 1 cup flour
- 0.5 cups salt
- 125 ml water
- 1 tbsp. l. PVA glue
All ingredients are mixed well together in a bowl, and then the dough is thoroughly kneaded.
How to make a horseshoe from salt dough
To work you will need:
- Salty dough
- Flour
- Horseshoe pattern
- Board
- Stationery knife
- Toothpick
- Water
- Watercolor paints
- Brush
- Ribbons
Manufacturing process
- The board is well sprinkled with flour. In the future, the horseshoe will dry on it. The dough is also sprinkled with flour on both sides and rolled out with a rolling pin to the desired thickness. The thickness of the horseshoe can be any, but in our case it will be 1 cm.
- A template is attached to the rolled out dough. To fix it and prevent it from coming off, you need to roll it with a rolling pin.
- Using a stationery knife, cut out a horseshoe on the dough according to the template. You should work carefully to ensure that the horseshoe is even. Excess dough is removed to the side so that it does not interfere. The edges of the horseshoe are trimmed with your fingers, since the dough is plastic and any unevenness can still be corrected. The template is removed.
How to decorate a horseshoe from salt dough
- The horseshoe is almost ready. All that remains is to decorate it, and this will be the most interesting thing. You can decorate with flowers made from salt dough. The dough is rolled into a sausage. You need to work on a board on which flour is poured so that the dough does not stick to it. After the sausage is ready, you need to cut it into even pieces. It is better to use a ruler so that the size of the pieces is the same, since they will be used to make rose petals, which should also be the same.
- Roll each piece of dough into balls.
- To form petals, the palm is greased with flour and a ball of dough is placed on it, which is pressed with a finger, forming a petal. If your finger sticks to the dough, you need to dip it in flour. This is done with all the petals, which are laid out on the board in one row.
- Using a utility knife, cut all the petals in half. After this, they take the edge of one petal and begin to fold a line of petals. There is no need to squeeze tightly with your fingers so as not to deform the rose flower, which is obtained as a result of twisting. Each rose petal needs to be opened to give the flower volume. This will give it a more lush and natural look. The required number of such roses is made and they are glued to the horseshoe.
- To create leaves, you need to roll out exactly the same sausage and divide it into different pieces: larger and smaller.
- Each piece is rolled into a ball, after which one finger is placed on the edge of the ball and slowly rolls the dough, getting an elongated tail. The shape of the dough resembles a droplet. It is placed on the board and pressed with a finger, resulting in a flat drop. Using a toothpick, draw veins on the leaves. Each leaf is glued to the horseshoe, complementing the flowers.
- To make a carved horseshoe, you can use a toothpick. To do this, use a toothpick to draw a pattern along the edge, squeezing out dots and lines, forming an ornament. Instead of a toothpick, you can use a pencil or the back of a brush, then the dots and lines will be thicker, which changes the style of the drawing and its ornaments. It all depends on preferences, fantasy and imagination.
- You need to make two holes in the top of the horseshoe so that it can be hung on a wall or door.
- The finished dough horseshoe needs to be dried. It can be left to air dry, or you can place it in the oven at a low temperature with the door open to speed up the process. After proper drying, the salt dough product will not change shape or color.
- After complete drying, the horseshoe can be painted. For this you can use acrylic paints, gouache, but it is more convenient to use watercolors.
- The background of the horseshoe is colored yellow, the leaves are colored green, and the roses are colored red or pink. To make roses look realistic, you need to mix white paint with the color in which the roses are painted and paint the tips of the flowers. This way they will look like they are real and sunlight is falling on them.
- After painting, you need to leave the horseshoe so that the paint dries. Ribbons are threaded into the prepared holes. They need to be tied together and get a beautiful bow. Excess ends are cut off and set on fire with a lighter so that the ribbon does not unravel.
- You can use glitter for decoration. The color of the glitter should match the color on the details of the product. But don't overdo it. Not the entire surface of the leaves and flowers is covered with glitter. They need to be distributed in the form of separate drops, then the work will have a neat appearance.
Such a hand-made horseshoe can be hung on the door, and it will bring happiness and good luck to the house. Or you can put it in a frame under glass instead of a photo, then it can be hung on the wall.
Video on the topic of the article
Recipe for salted play dough
How to make salted play dough
How to make a horseshoe with your own hands
DIY amulet for the home
How to make a working amulet for your home with your own hands
How to make salt dough for sculpting crafts
We have selected several simple recipes for salt dough, which will be easy to make even for a child.
Salt dough for crafts
How to make high-quality salt dough
Crafts made from salted dough
Step-by-step master class on crafts made from salt dough
How to make a magnetic board with your own hands
An indispensable thing in the house is a magnetic board.
Source: https://webdiana.ru/dom-i-semya/rukodelie/9597-podkova-iz-solenogo-testa.html
Materials and accessories
For the test:
- 1 cup flour;
- 0.5 cups fine salt;
- 0.5 cups regular medium salt;
- approximately 1 - 1.5 tbsp. cold water.
To work you will need:
- stacks or scrap materials;
- knife;
- rolling pin;
- gouache paints;
- tassels;
- twine;
- glue gun with silicone rods;
- universal aerosol varnish.
If you don’t have a gun, you can use Moment glue.
Master class on making a horseshoe from salt dough - Website for girls
Hello! Today we will make a horseshoe from salt dough, which should bring happiness and joy to the house. Let's prepare the salt dough, don't forget about the brownie and color our craft a little black, red, yellow and green. So, let's get started: make your own horseshoe, a detailed master class.
We make a sausage from black dough.
Next, we bend it and press it to the desktop.
Then, using a rectangular shape, cut out 2 figures on the rolled out dough.
We glue them to the edges exactly in the middle of our salt dough horseshoe (as in the photo below):
We make big holes.
Use a stack or a stick to make stripes all over the product.
Next, cut 4 holes - two on each side.
Loaf
Particular pleasure will come from decorating dishes, for example, a loaf. The production of salt dough to decorate this product is carried out according to the recipe described above. The classic way is to twist ropes from the finished material and braid them. You can also make flowers and leaves from the dough. The decor is laid out on the top of the loaf and dried in the oven.
Such handicraft, accessible to everyone, allows you to please your loved ones and friends with an original thing, develops imagination and perseverance. In addition, the activity makes it possible to complement any look with beautiful jewelry.
DIY horse and horseshoe made from salt dough: Master class
The best gift for the New Year 2014 is a DIY horse!
You can also make a horseshoe from salt dough. Simple, fast and original!
Instead of buying Chinese trinkets, take a glass of salt, flour, a little water and stick exclusive, cute, personal souvenirs to each of your friends!
You will need:
- For the salt dough:
- - 1 glass of flour (200g);
- - 1 glass of coarse rock salt;
- - 5-6 tablespoons of water.
- For decoration:
- - cocktail tube;
- - match.
- For coloring:
- - children's gouache or acrylic paint;
- - thick and thin brushes.
How to make a horse and horseshoe from salt dough:
Salt dough is an excellent alternative to clay and plasticine, because the ingredients for its preparation are always available in the house, preparing salt dough and working with it is easy (even kids can handle it!), and crafts made from salt dough are beautiful and durable. If you dry the craft in the oven, it becomes hard and can be painted. Dough toys are only afraid of dampness; if there is high humidity in the house, they can become limp.
Prepare the salt dough: combine salt, flour and water, first mix with a spoon, then knead with your hands until you get a lump of elastic, homogeneous dough, in which salt crystals glisten like sparks on the snow (I really like this texture).
If the dough is dry and crumbles in your hands, you need to add a little water; if it is too soft and the formed figures blur, on the contrary, you need to add a little flour.
- Having brought the dough to the desired consistency, let's get creative!
- There are two ways to make your own horse or horseshoe from salt dough.
- First: using tin baking dishes, an article about the manufacture of which was recently published on the site.
- Lightly dust the table with flour, roll out the salted dough to a thickness of 0.5-1 cm and cut out a horse or horseshoe shape.
It turned out great! Now we decorate the figures a little for greater expressiveness: we draw the horse’s eyes, nostrils, give relief to the mane and tail, and draw carnations on the horseshoe - using a match and a cocktail straw. If you are going to hang the figures on the Christmas tree, use a tube to make holes for the threads.
No form? No problem, we will make the figures by hand! For a horseshoe - roll the sausage, bend it and press it slightly, giving the ends a rectangular shape.
And the horse will turn out not flat, but voluminous! Take a lump of dough and form a horse out of it: head, legs, tail; then we detail: ears, mane. We use a match to give it a relief, and for the eyes you can roll up tiny balls, moisten them a little, and stick them in place. We make the pupils and nostrils using a match.
Place the finished figures (and spread them out) on a baking sheet and dry them in the oven for about half an hour at 170-180C. Warn your household that the dough is salty, otherwise they will think it’s cookies!